Photographing the Milky Way requires a dark sky to provide the best opportunity for success. Therefore, knowing the optimal timeframe to photograph the Milky Way is a key factor to success. The biggest obstacle to a dark sky is reflected light from the sun. Even the smallest amount of sunlight in the twilight sky will overpower all but the brightest stars. There are three periods of twilight after the sun has set: Civil, Nautical, and Astronomical, with a dusk after each period. The darkest period during the night is the Astronomical Dusk which follows the Astronomical Twilight. At Astronomical Dusk there is no sunlight affecting the night sky. This final dusk, Astronomical Dusk, typically occurs 1.5 to 2.5 hours after sunset. Usually, the best time to obtain the darkest night skies is between two hours after sunset and two hours before sunrise.
Although following the general rule of photographing a starry night two hours after sunset and two hours before sunrise is convenient sometimes you may want a more precise determination of Astronomical Twilight. For this, I use the PhotoPills iPhone app. Using the PhotoPills' iPhone app, open the Planner feature, and you can easily determine schedule of the twilights. PhotoPills will allow you not only to determine the current day but any day in the future the twilights. PhotoPills is a remarkable tool for planning a Milky Way shoot as it offers so many features to assist you in making proper plans.
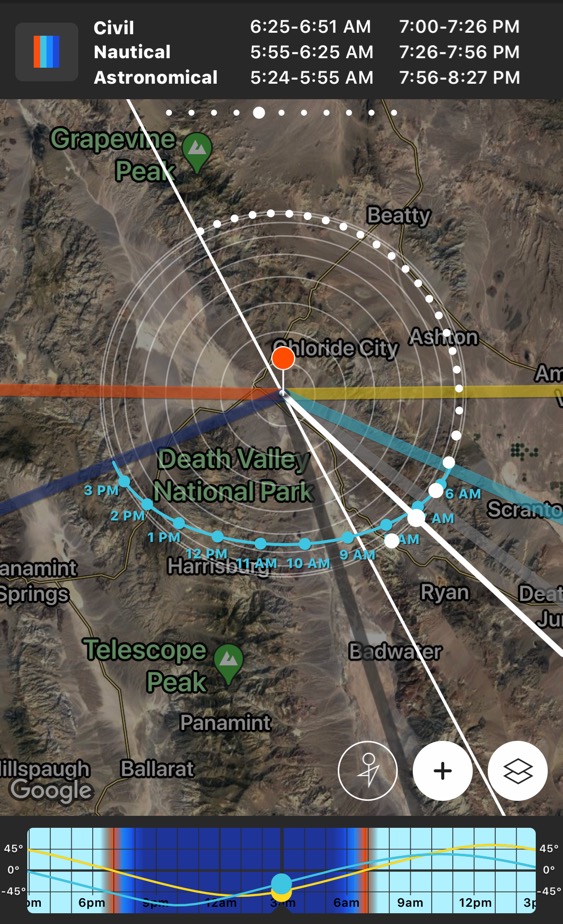
In the example below, the PhotoPills app shows that Astronomical Twilight ends at 8:27 p.m. thus the beginning of Astronomical Dusk and the beginning of the darkest night sky.
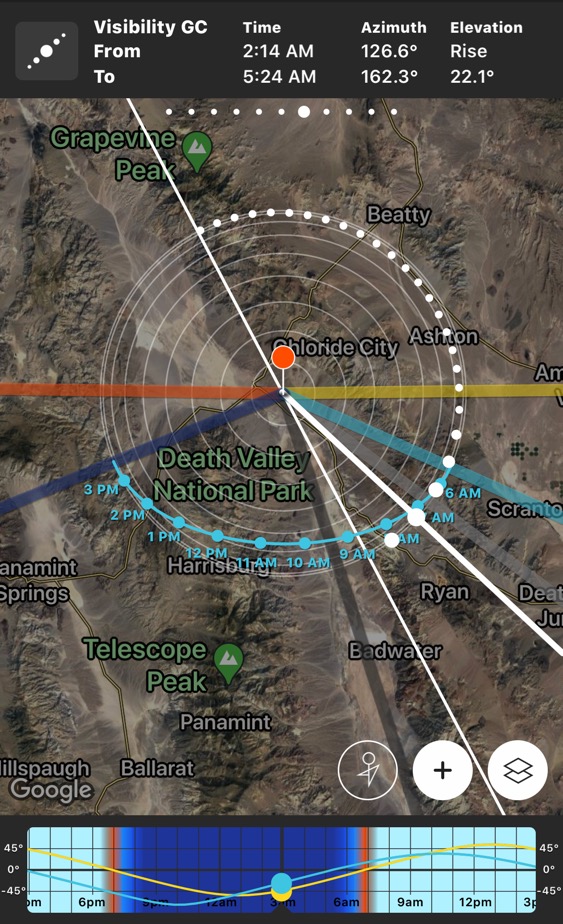
The PhotoPills example below shows that if you were in Death Valley National Park on this particular day the Galactic Core of the Milky Way would be visible from 2:14 a.m. to 5:24 a.m. This is very helpful so that you when the Milky Way core is visible and can plan accordingly to arrive an hour before.
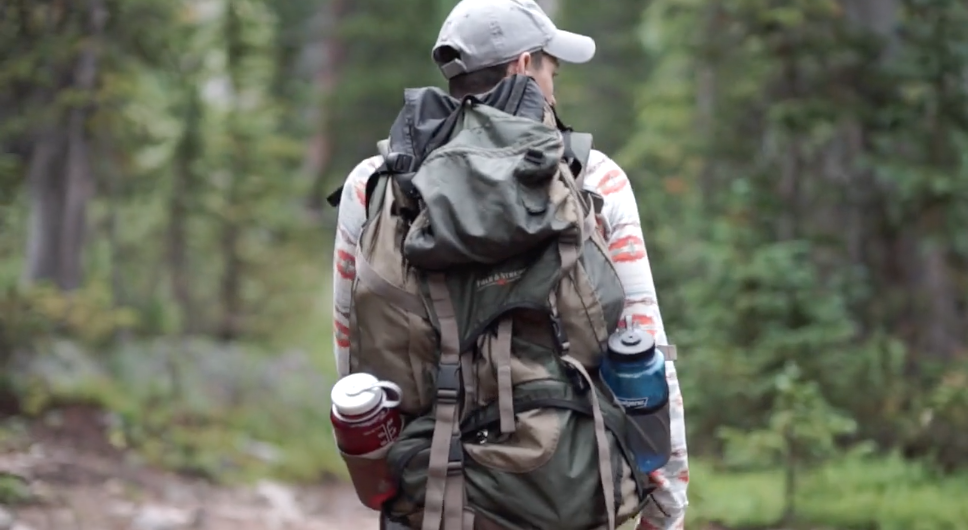
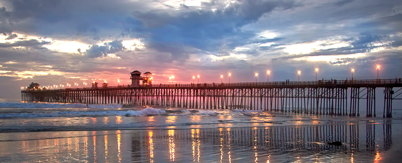
If you are lucky enough to live near a beach you may want to search out a pier. These massive structures that stretch into the ocean can make for an incredible photograph especially when made into a metal print. The colors at sunrise and sunset along with the waves look great particularly on glossy solid metal prints.
Photo by J. Libertini
How To As with landscape photography, early in the morning and late in the day offer that desired warm light and long shadows to create mood and atmosphere, to best photograph piers. Whether it is a blue sky on a clear day or a dark thundery storm is approaching you will have an excellent backdrop for these imposing architectural wonders.
Although you may not capture the full expanse of a pier shooting underneath it, you will have an opportunity to get up close with the barnacles and other sea creatures that make interesting subjects. Another interesting technique is to turn the pier into a silhouette; this is accomplished by exposing for the sky rather than the pier.
I hope you have a chance this summer to enjoy the beach and take several interesting photographs.
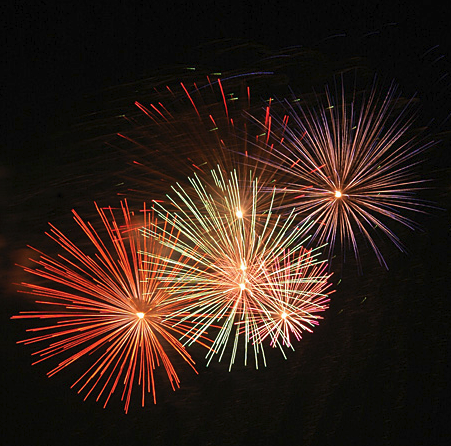
Well here are some tips on digital firework photography.
Since autofocus can be slow when its dark, set your digital camera to infinity mode, or manually focus to infinity. Capturing the light trails requires long exposure times. With long exposure times you need to use a tripod or some type of support to ensure sharp exposures. Also use the self-timer or a camera remote to release the shutter. A cable release ensures that you won't have to physically touch the shutter release thus eliminating the possibility of camera shake. Turn off the flash (if you can’t turn it off, tape a piece of cardboard over it).
Set your camera’s focal length to the equivalent of 50 mm or wider. Using a wide focal length is generally more effective than zooming in when photographing fireworks because the aperture is faster at the wide end of the zoom. Later, when editing, you can crop to give the appearance of a close-up shot.
In short, the best way to photograph fireworks is to set the camera to manual exposure, set the aperture to a suitable f-stop and the shutter to 'b' or bulb. Open the shutter just before the firework bursts and close it after it's finished. By the way firework photography looks especially impressive on metal prints. The metal print surface that I recommend would be either the glossy solid or clear glossy.
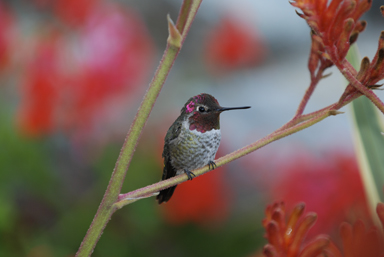
Did you know that Hummingbirds are the only birds that can fly backwards? They can also fly sideways and upside. Pretty amazing. Not only are hummingbirds wonders in flight but make great photographs due to their iridescent colors. Its best to take pictures of hummingbirds in bright sun so you can capture their iridescent colors. With regard to equipment, I suggest that you use zoom or telephoto lens so you can get a good close-up. Additionally, I recommend using a tripod or monopod for stabilization. If your lens has a stabilizer feature then make sure it is turned on.
By using the auto-focus (AF) setting on your camera this will allow you to refocus on the hummingbird as it is darting around. Its helpful to use the center AF point for focusing. You also need to use a fast shutter speed of 1/800 and an ISO of about 400. Keep in mind, that if either are too high in low light you will get too much noise making your picture look grainy.
Especially with hummingbirds, you will want to take a lot of pictures. But once you capture that great image it will be well worth the effort.
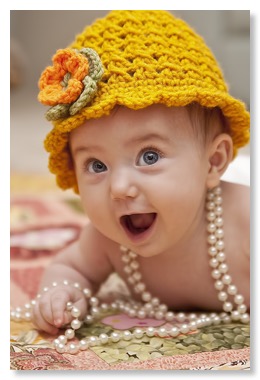
Creating a photo record to display your child's growth is a wonderful way to capture a lifetime of memories. Here are a few tips to make those photos best reflect a child's personality.
Get Down to the Child's Eye Level Getting down to a child's eye level will easily change the image of the child. When you photograph a child from their level you gain a different perspective and you to feel more in the moment with the child. The child will be more comfortable thus allowing you to capture their personality. Additionally, it will help avoid photos of the tops of their heads which is common when photographing down towards the child.
Get Closer You can capture so much of a child's character when you tightly focus on the child. You can accomplish this by either zooming in on the child using your lens or simply physically move closer. Photos taken without a close focus often contain unwanted items that distract from the image. Therefore, I suggest getting so tight that you are cutting a bit of the head or chin. You’ll be pleased how closely focused images look.
Use Props Get creative and use toys, clothing, gadgets or furniture as props. The use of props often puts children at ease and will allow you to photograph playful moments. Your photos will be more animated and filled with happy smiles.
Pixel2Metal's most popular metal print surface for portraits is the matte finish.
HDR stands for High Dynamic Range. HDR Photography is a post-processing task that uses multiple images of the same scene shot at different exposures that are combined into one photograph. The outcome is a photograph with exceptional detail in the shadow and bright areas of the image. Our eyes are infinitely more perceptive than a camera sensor.
Our eyes allow us to see and perceive colors and tones no electronic device can capture. With a camera, information is lost in the shadows and bright areas. Cameras are limited in that they can only capture fairly limited dynamic range. However, taking images with your camera at different exposures you can render the light areas, mid-tones, and dark areas of the same scene to gather all the rich detail. With Photoshop, Lightroom, and other HDR programs you can assemble these images into one photo that resembles all the information the human eye captures.
If you are a fan of HDR photography then I highly recommend you try one of your images on metal by Pixel2Metal. Metal prints lend them selves to saturated colors and dramatic high contrast.
A frequent question we receive is how are metal prints made. Metal prints are made using a unique process called dye sublimation. Although dye sublimation has been around for a while it hasn't been used in the photo industry until more recently. Dye sublimation is essentially the process of going from a solid (ink) to a gaseous state, back to a solid state (image embedded into the metal). Because the image is infused into the hard coating of the aluminum panel it provides outstanding durability, definition and color. Unlike conventionally printed photos, metal prints are easily cleaned, waterproof and scratch resistant, and don't need expensive frame and glass.
More specifically this is how the process of making a metal print works. First, the image is reversed and printed onto transfer paper with special dye inks. The aluminum panel is then taped to the transfer paper. With the transfer paper on top and the aluminum panel below it is placed into a heat press, which is heated at approximately 400 degrees Fahrenheit. With the pressure and the heat of the press the sublimation inks transform into a gas which is then absorbed into the polymer base coating of the aluminum panel. As the aluminum panel cools the coating stabilizes and the image is permanently embedded.
Many box stores and large photo retailers use cheaper and lower quality aluminum panels. At Pixel2Metal we only uses ChromaLuxe aluminum panels as their specialized coating is the best for a stunning and durable image.
While we believe photos should be taken year-round, fall is a fabulous season to be a photographer. With changing foliage, football, back-to-school transitions, pumpkins, Halloween parties, and trick-or-treating costumes you have a plethora of subjects to photograph.
In many parts of the country, fall is a colorful season of changing leaves as Mother Nature makes the transition from summer to fall. Sometimes the prime window is only a day or two long, depending on the weather. The sunlight changes in the fall too, enhancing the golden glow for shooting outdoors with a palette of rich reds, golden yellows and warm oranges. A polarizing filter is a helpful tool to capture the rich, saturated colors without glare, whether you're shooting on a sunny or cloudy day.
Enjoy Mother Nature's transition through your lens and share your favorite photos with us!
Unlike many other print media such as canvas, photographic paper and acrylic, metal prints are easy to clean. Metal prints can be cleaned with a soft cloth and any all-purpose household cleaner. Furthermore, the cleaner can be sprayed directly to the metal print and then wiped or with a cloth as needed. Since metal prints are easy to clean and will not degrade due to oils from skin they can be touched with being damaged.